SPORE PRINTS
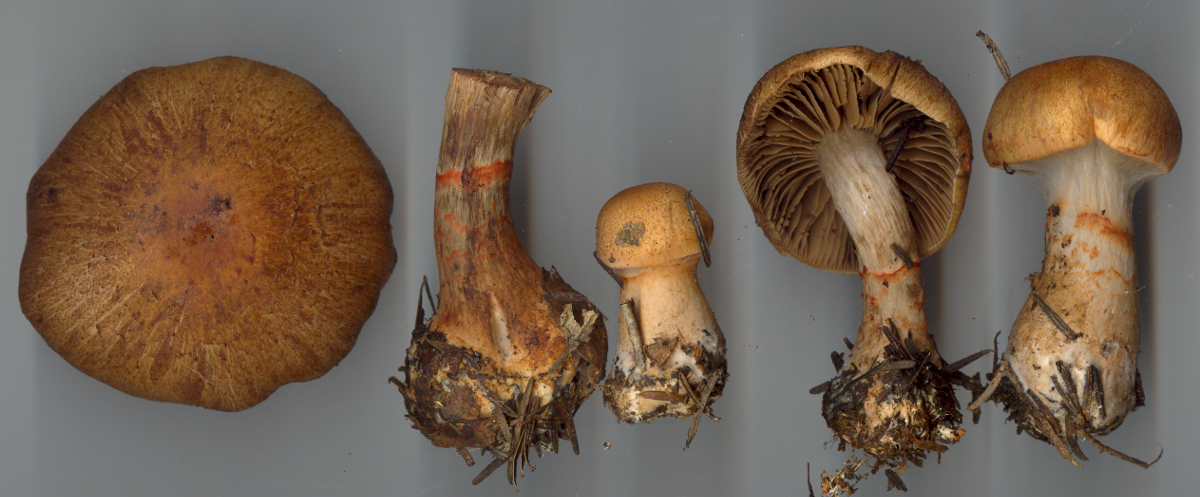

The picture above is of four fruiting bodies of Cortinarius armillatus, a mushroom commonly collected under birch. These were "photographed" on a flatbed scanner not long after they were collected. The leftmost mushroom in the picture had its stipe removed and placed beside the pileus. At far left is a scan of the same pileus inverted to show the lamellae.
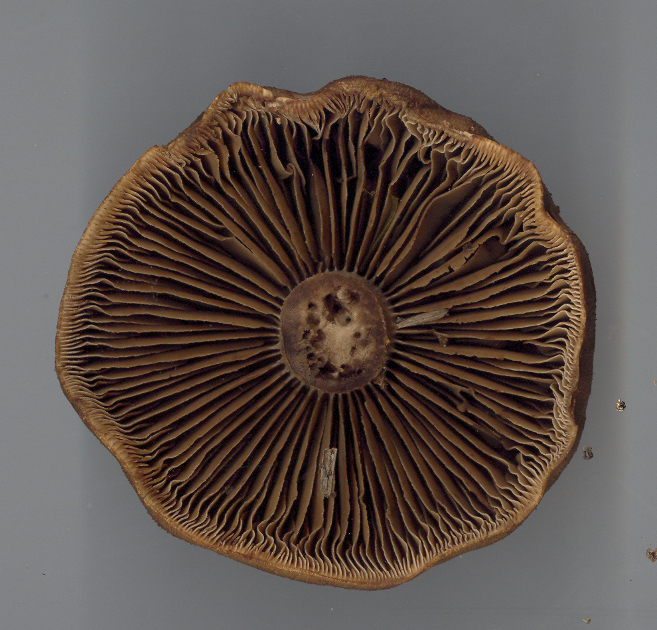
The same pileus that had been removed from its stipe was place lamella-side down on a sheet of white paper, covered with a bowl and left overnight. The photo at near left shows the result. The spores produced on the lamellae had been discharged during the night and had formed a thick deposit on the paper, a result called a spore print. It is a photograph-like impression of the pileus and lamellae. Usually white paper is used for spore prints, but white spore prints may be difficult to see and some people have chosen to make spore prints of a mushroom on both black and white paper.
There are several reasons why you might want to make a spore print. First, and perhaps most important of all, is that for more than two centuries mushrooms have been classified according to the colour of their spores. The page on mushroom classification briefly discusses how that works. In common with other species of Cortinarius the spore print of C. armillatus shown here is clearly a light brown colour. Had it been some colour other than brown we would not have classified it in Cortinarius
A second reason for obtaining a spore print is to be assured of a collection of mature spores for microscopic examination. A piece of lamella examined with a microscope will usually bear large numbers of spores, but these may range from small, really immature ones to others that are quite mature and ready to be shot away. Because the size and shape of basidiospores is important in the identification of mushrooms, and to their ecology, it is best to work with completely mature ones as are found in the spore print.
Mycologists may also be interested in cultivating a mushroom, either in a Petri dish for microscopic examination or for genetic studies, or for obtaining fruiting bodies on a larger or even industrial scale. Freshly discharged spores are essential for these purposes.
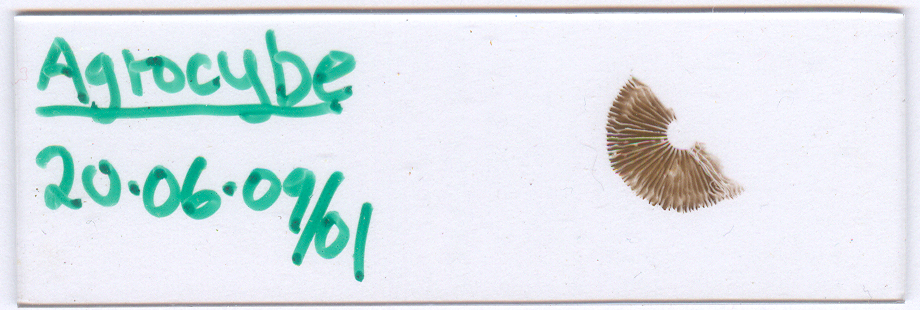
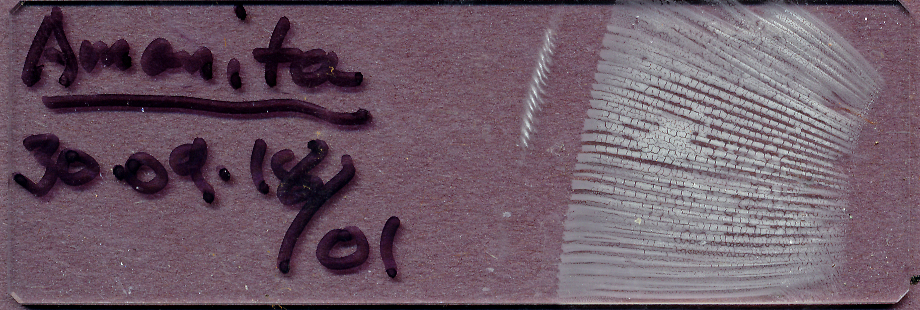
Although spore prints on paper are the most common it is possible to obtain a print on other materials such as glass or clear plastic. We prefer to do ours on glass because even very weak prints that might not be visible on paper can usually be seen. It is also often difficult to remove spores from paper for microscopic examination, while removal from glass is usually successful. We use glass microscope slides for this.
In recording spore print colour for your notes you can use any colour system, such HSV as described on our colour page.
HOW TO MAKE A SUCCESSFUL SPORE PRINT
1. Use fresh but mature mushrooms
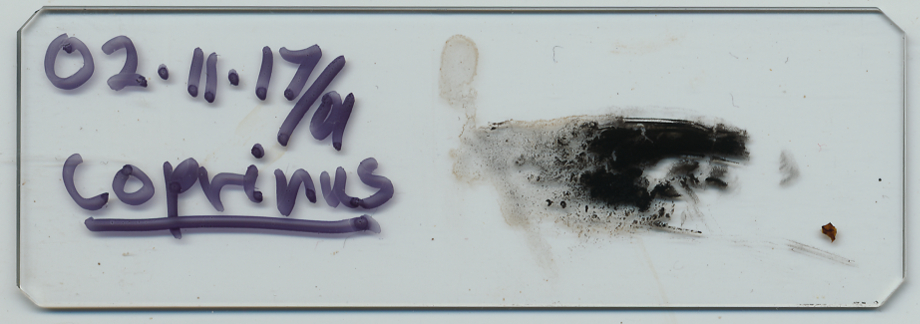
Very young mushroom caps may not yet have produced mature spores. Choose ones that are expanded enough that they seem to be discharging their contents. At the same time, avoid ones that are overmature. Once mushrooms reach full maturity they may decompose rapidly into a pool of sludge. We have had especially bad experiences with boletes in this regard. Just look at the picture of a Boletus spore print below to see the kind of mess you can get! Species of Coprinus and similar genera with self-digesting gills can also give unattractive results. Mushrooms that seem to be dried out will often give poor prints.
2. Try to avoid air currents that may distort the print
Unless you are trying for an artistic effect, you will not want to have air moving between the pileus and the printing surface. If printing an undivided mushroom on paper you will simply need to cover it with some kind of bowl. Smaller mushrooms or pieces of larger ones are usually best printed inside a covered contained. We use the plastic boxes used by stores to sell sandwiches and salads. These boxes have a hinged cover that will effectively block aircurrents.
3. Don't let the mushroom get too dry or too wet
Maintaining the ideal humidity is perhaps the trickiest part of making spore prints. Dry mushrooms won't give a good spore print, but wet ones can make a sloppy mess. If you put a small mushroom on a piece of paper and cover it with a large bowl you may end up with a shrivelled cap and no spore print. A smaller bowl or cover may keep the moisture from evaporating but with very small mushrooms it may be necessary to carry out the whole process in a chamber containing a source of humidity. Again, sandwich boxes are ideal because you can line the bottom with wet paper towels. The printing surface can then be raised above the wet towels on some sort of platform. When printing on glass slides it's only a matter of keeping the glass above the wet towels, usually on small sticks such as wooden skewers.
4. Raise fleshier mushrooms slightly above the printing surface
Larger and fleshier mushrooms, even if you are printing a pie-shaped piece of the pileus, tend to break down where they are in contact with the printing surface. Just raise them up on matchsticks so they are not directly on the surface.
5. Include the spore print with your dried collection
Once a spore print has been obtained, it should be air-dried for a few hours. To keep the spores from rubbing off over the many years (or decades, or centuries) in the herbarium or museum it is best to protect them in some kind of container. Prints on paper can be gently folded over and placed in small envelopes. Those on glass slides can be also be put in small envelopes or in specially designed microscope slide holders.
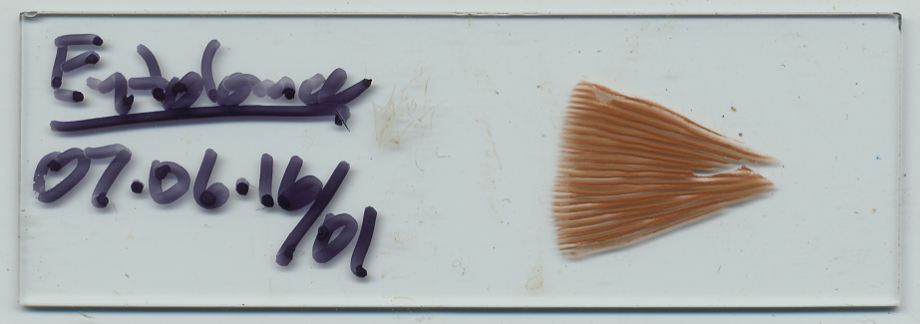
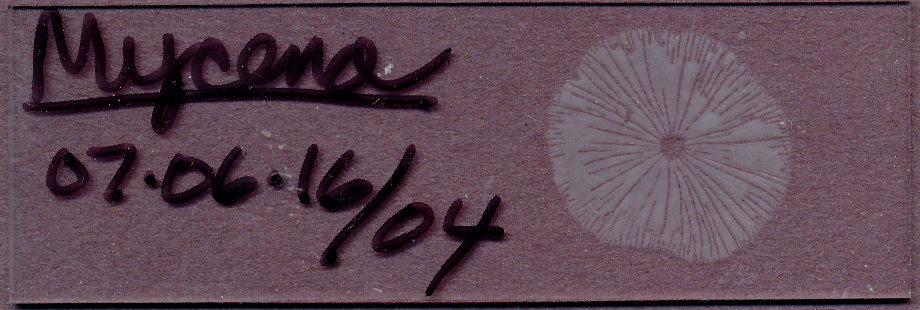
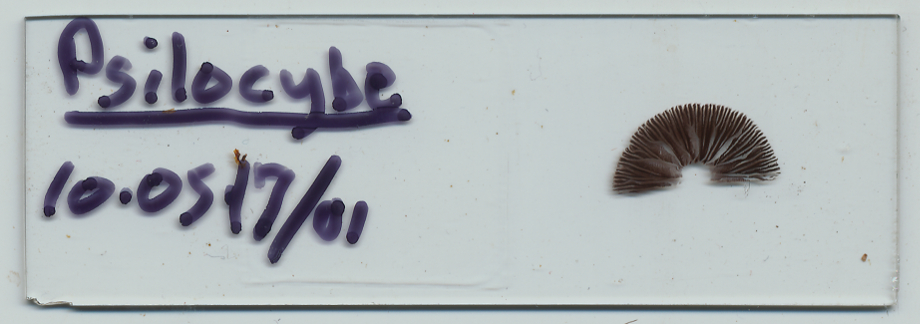
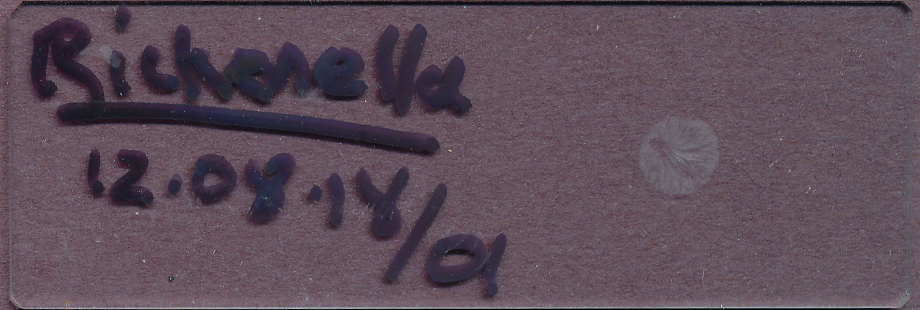
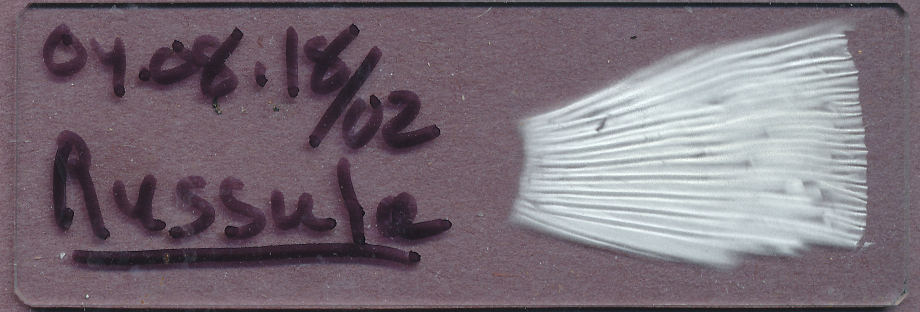
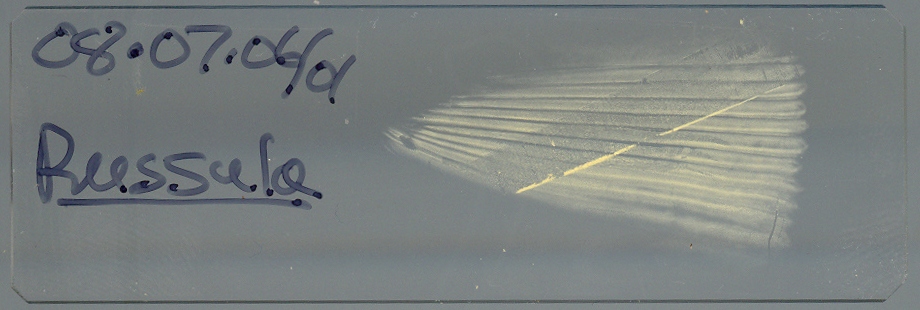
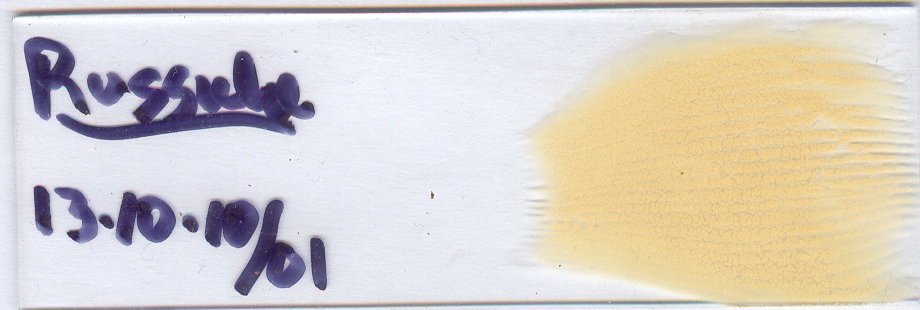
The pictures below show 18 spore prints made on glass slides. They vary in several ways, including the size of the mushroom used, the type of mushroom used and background colour. In spite of these variables, it is clear that the mushrooms had quite a variety of spore colours.
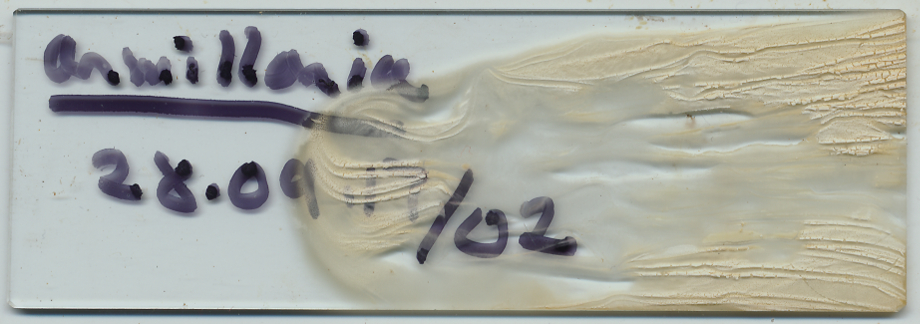
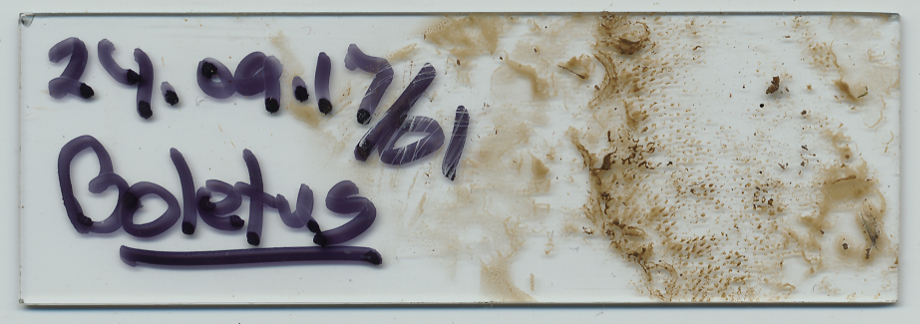
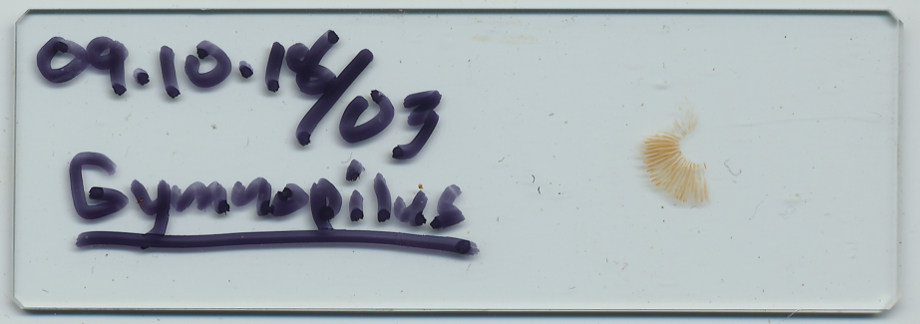
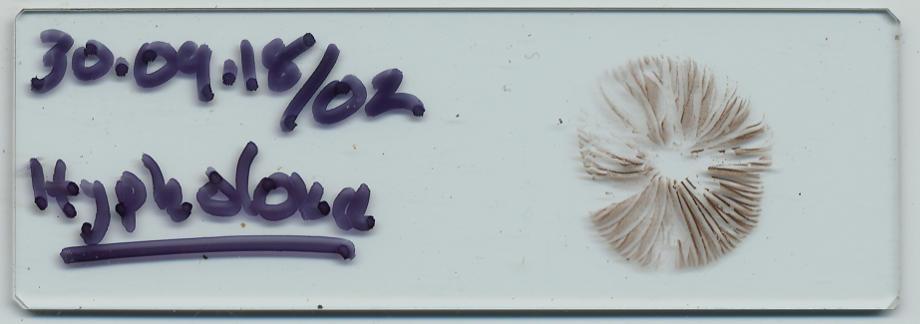
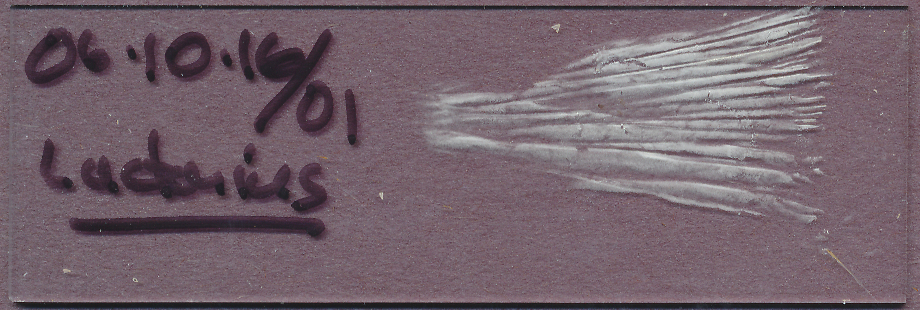
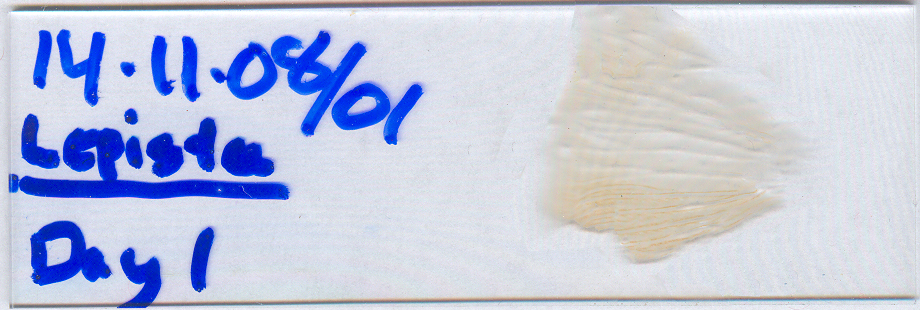
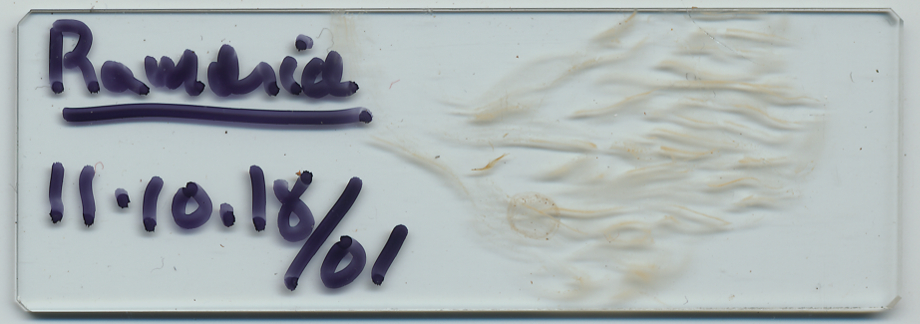
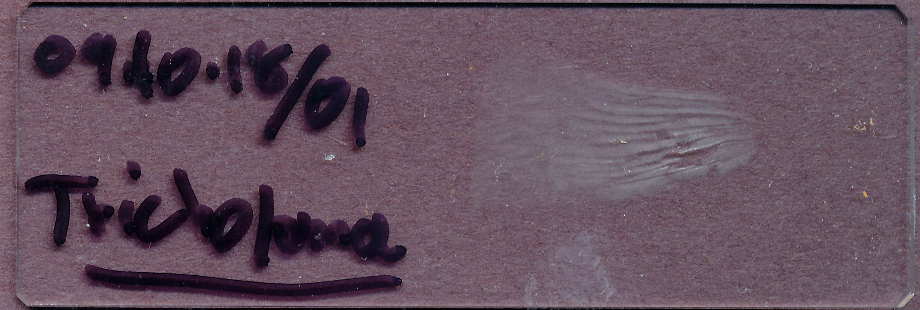
You may have noticed that although most of the spore prints faithfully reflect the outline of the lamellae or the fruiting body, some are not so clear. The Boletus print should reflect the honey-comb nature of its spore-bearing tubes, but as noted in Point # 1, the mushroom was already beginning to decompose and gave a sloppy result. The Ramaria spore print is more interesting as it reflects the branched nature of the coral fungi.
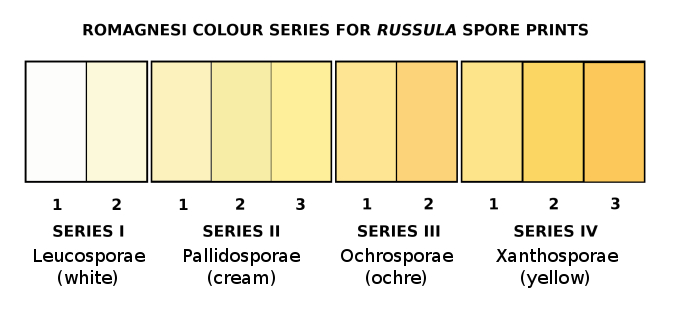
The final three prints show spore colours ranging from pure white to yellow-orange. These are all from species of Russula, a large genus whose species are particularly difficult to identify. The colour of the spores is a primary and essential feature needed to carry out the identification. A collection of a Russula species without a spore print is exceedingly difficult to name. The French mycologist Henri Romagnesi classified Russula spore colours into four sections, establishing a system still very much in use. You can use the HSV system to characterize the colours of your spore print, even with Russua.